Once you have set up all of your materials as sources in the system you are ready to input usage, waste and storage data.
There are two ways to add a Chemical Usage record to the EHS-Dashboard™:
- Add a single record via the Chemical Usage form
- Using the Data importer
NOTE: If you are adding a single record, the Chemical Usage form is the best option. For larger data sets, the data importer tool is recommended.
Adding a single record:
1. Click the "Add Data" button in the upper right corner of your screen to begin the wizard:
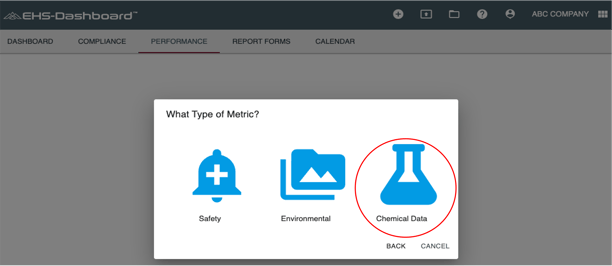
2. This opens a wizard in the middle of your screen. Click "Metrics":

3. Click "Chemical Data":
4. Complete the form and be sure to click "Save" before exiting:
Note: Click on '+Add Process Line' to associate this material record with a previously configured Process Line.
Importing a Data Set:
1. First make sure that your Chemical Usage file is ready. The spreadsheet you wish to import with your usage data must have the following column headers:
Required:
- Date of Record
- Part Number
- Material Name
- Amount
- Units
Optional Columns:
- Category
- End Date
- Notes
- Start Date
- Storage Location
- Usage Type
- Vendor
- Etc.
Use the import template located HERE for an example spreadsheet that can be used to upload material data.
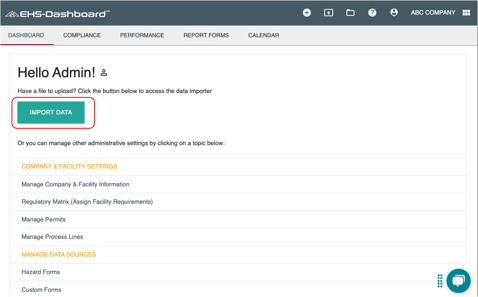
2. Once your spreadsheet is ready to be imported - Click on your company name in the upper right-hand corner of the screen:

3. From the Admin screen, Click "Import Data":
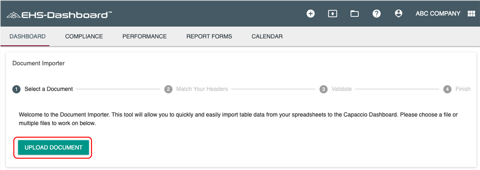
4. Click "Upload Document":
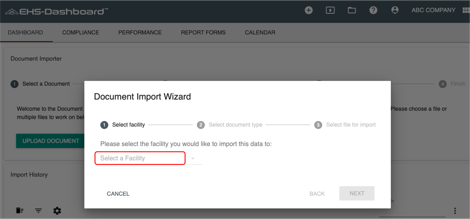
5. Use the drop-down for "Select a Facility" to select the facility you are uploading data to, then click "Next":
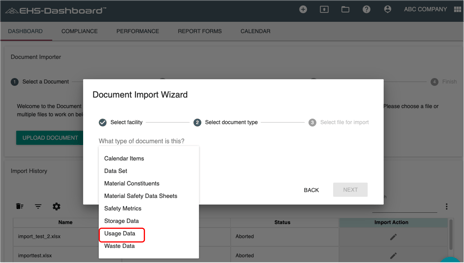
6. Use the dropdown menu for "Select document type" and select the type of data you are uploading (“Usage”, “Storage”, or “Waste”) then click "Next":
7. Now click "Select File" to locate the file and upload it. Once attached, click "Next":
8. This next window asks you to match your data set to the platform's database. Here you will Add your Data to the Database, and ONLY if appropriate, utilize the date range (only use if you do NOT have Date of Record data in your spreadsheet).

You will also select the appropriate choices to match the Excel file column headers in each “Match to database" dropdown
You will see there are headers that are required to be matched to the Excel file column headers, be sure to match them to the correlating columns:
NOTE: If there is not a specific option in the dropdown that matches part of your data, choose 'Add To Properties' and your data will be added to the platform database under the Column Name provided.
Once each column has been matched, click “Next”:
9. This next page will display an overview summary of the data that is being imported and will alert you to if any Part Numbers are not recognized. Resolve any Source discrepancies, scroll to the bottom of the page and click on ’Next’ to upload your files.

12. Congratulations! This is what your page will look like once the file is being uploaded.
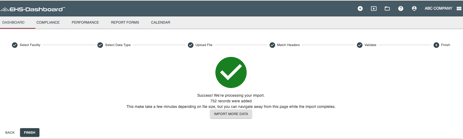
NOTE: This import record will show up in your import history after completion.
If you added any new part numbers during your import, you can learn how to resolve material setup issues in this article.